Flask, Django, and Deploying
Creating a Simple React + Flask Web App with Deployment on Vercel
Objective:
In this assignment, you’ll build and deploy a simple "Quote of the Day" app using React for the frontend and Flask for the backend. React will handle the user interface, and Flask will give us an easy way to set up an API for serving random quotes. We’re using Flask instead of Django because it’s lightweight and perfect for small projects like this—no need for extra features we won’t even use. You’ll deploy the React app on Vercel so it’s live and shareable, and the Flask backend on a platform like Render or Heroku. Deployment is super important because it makes your app accessible online and shows you how to connect the frontend and backend in a real-world scenario. By the end, you’ll have a simple, deployed app to show off!
NOTE: If the deployment part does not work, then you do not need to deploy the frontend or backend, as long as you have a basic flask and react web app to show you understand how to use flask.
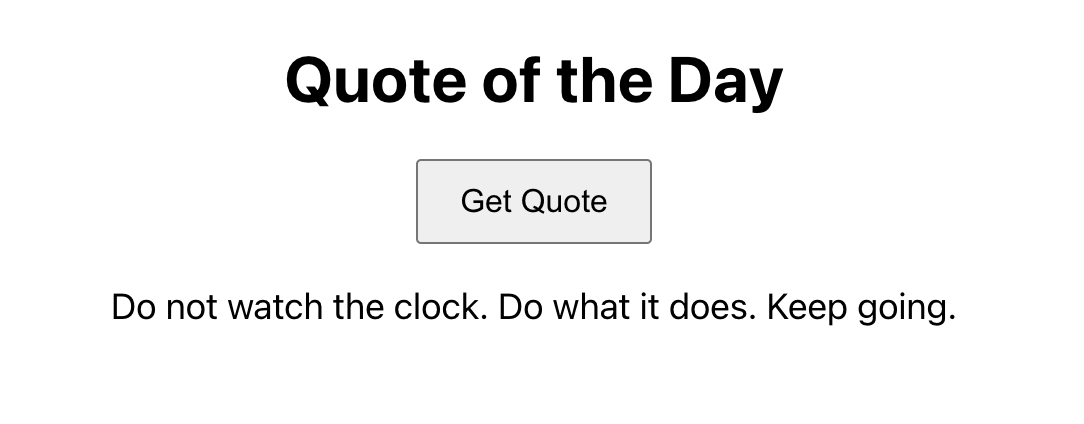
The React site should look something like this (the quotes should be randomized when you click the button).

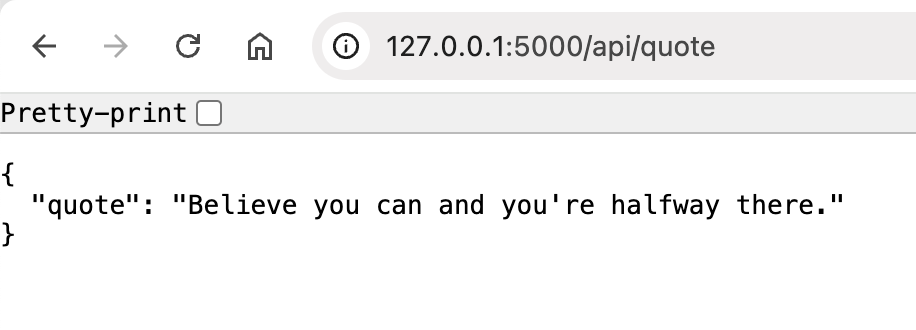
The backend flask server should look something like this (refreshing the site will randomly change the quote).

Part 1: Create a GitHub Repository and Set Up React
- Create a GitHub Repository:
- Log in to GitHub and create a new repository for the project.
- Clone the repository to your local machine using your terminal.
- Set Up the React App:
- Navigate into the cloned repository directory on your machine.
- Create a folder called "frontend" inside the repository folder and initialize a React app inside this folder.
- Commit the initial React app to the repository and push it to GitHub.
- Test the React App Locally:
- Run the React app on your local machine to ensure it works correctly before proceeding.
Part 2: Deploy React Frontend on Vercel
- Link the GitHub Repository to Vercel:
- Log in to Vercel and connect it to your GitHub account.
- Select the repository you just created and link it to a new Vercel project.
- Deploy the React App:
- Follow the guided steps in Vercel to deploy your React app.
- Note the live URL provided by Vercel and test the deployed app to ensure it works as expected.
Part 3: Set Up Flask Backend
-
Set Up a Virtual Environment: Create a Python virtual environment to isolate your Flask backend dependencies. This is so that the dependencies for this project do not interfere with other projects you may have.
-
Navigate back to the root project folder (repository folder, not frontend folder).
-
Create and activate a virtual environment:
python -m venv venv
source venv/bin/activate  # On Windows, use: venv\\Scripts\\activate
-
-
Install Flask and CORS:
- Install Flask for building the backend and enable CORS to allow the React app to communicate with the backend.
-
Build the Flask Backend:
- Create a new folder called "backend" inside the repository folder.
- Write a Flask API endpoint that serves a random quote.
- make sure to import the necessary libraries and set up the Flask app.
- Test the backend locally to ensure it works (run the flask file in the terminal).
-
Deploy the Backend:
- Use a platform like Render or Heroku to deploy the Flask backend.
- Note the backend's public URL for later use in connecting it to the React frontend.
Part 4: Connect React Frontend to Flask Backend
- Update the React App:
- Modify the React app to fetch data from the deployed Flask backend. Replace any local backend URLs with the public URL of your Flask backend.
- Push Changes to GitHub:
- Commit and push the updated React app code to GitHub. Vercel will automatically redeploy the app.
- Test the Deployed App:
- Visit your Vercel app's live URL and confirm that it fetches and displays quotes from the backend.
Part 5: Submit to Gradescope
To submit your assignment:
DO NOT upload your entire project folder as-is.
DO NOT upload yourvenvfolder. This contains your virtual environment (a local copy of Python and installed packages) and can be very large. It's not needed for grading since we can install everything using yourrequirements.txt.
Note: You can ignore files using
.gitignore. Please refer to IMPORTANT FOR PROJECT: Vitamin 5 – Common Mistakes on Edstem for more info.
Only include the essential folders and files listed below:
frontend/– your React app folder.backend/– your Flask app folder.requirements.txt- so we can install everything in venv.